Monday, August 19, 2013

I'd Say That's Magic!

Hello lovely people,

I'm going to make this short and sweet. If you don't already know, I'm crazy about ice cream. I love it! Here is a great topping for ice cream and it only takes two ingredients!!! I know right? Awesome :)

Chocolate Shell

Ingredients:

- 1 Tbsp coconut oil 
- ¼ cup milk chocolate chips

Directions:

✿ Melt coconut oil and milk chocolate chips in the microwave. 

✿ Serve over ice cream and watch it harden in seconds!


Don't forget to have a little fun in the last couple of weeks of summer. Maggie and I went on our annual golf cart adventure this past weekend and I am surprised I still have all my limbs. Hahaha only the two of us would be going full speed down a gravel road in bathing suits "driving" a golf cart.

- Gaby


Tuesday, August 13, 2013

Peach Pie Please!

Hi foodies,

In today's post I'm going to blog about the magic of cottages. There's something about being at a cottage that puts you in a special mood. My aunt Nini has a cottage and even though it's twenty minutes outside the city, in Chelsea, Quebec, as soon as I get there I'm so relaxed and ready to have a good time. Since it's so close we can go up for family dinners and a swim and then drive home the same night.

Last Sunday we went up and I made Nini's favourite, peach pie. Yum yum was it ever good! I discovered this recipe last summer when Maggie and I were running a culinary camp at Dovercourt Recreation Center. The campers' parents were so impressed and with reason! The lattice top takes a little extra work but it's totally worth it. Brush some egg whites and sprinkle a little sugar on top of it before baking and you'll have people jumping through hoops and kissing your feet for more.

Just before you start making this pie, realize that it takes a while to make from start to finish. I'm talking hours and hours. Don't be scared away by this! Most of this time is the dough chilling, or the peaches soaking. Just be patient, the steps aren't that difficult, they're straight forward just lengthy.


Lattice Top Peach Pie

From America's Test Kitchen 

-1 recipe double-crust pie dough (you could use the roll out dough at the grocery if you wanted to)
- flour for work surface
- 2 1/2 pounds ripe peaches (7-8 medium), peeled (NAKED), pitted, and sliced 1/2 inch thick
- 1 cup, plus 1 Tbsp sugar
- 1 Tbsp cornstarch
- 1 Tbsp juice from one lemon
- pinch ground cinnamon
- pinch ground nutmeg
- pinch table salt
- 1 large egg white, lightly beaten

Directions:
  • Roll one disk of dough into a 12-inch circle on a lightly floured work surface, then fit it into a 9-inch pie plate, letting the excess dough hang over the edge; cover with plastic wrap and refrigerate 30 minutes to an hour.
  • Roll the other disk of dough into a 13 1/2 by 10 1/2-inch rectangle, then transfer to a parchment-lined baking sheet. Trim the dough to a 13 by 10-inch rectangle with straight edges and slice it lengthwise into eight 13-inch long strips. Separate the strips slightly, cover with plastic wrap, and freeze until very firm, about 30 minutes. *Note: You don't have to do a lattice crust on top, you could just put the second disk of dough on top and cut slits in the top to let steam escape.
  • To make naked peaches (aka peel them) make an x in the top of them with a pairing knife and then soak them in boiling water for 30 seconds. Place them in cold water while you soak the others in the boiling water.


  • Toss the peaches and add 1 cup of the sugar together in a large bowl and let sit, tossing occasionally, until the peaches release their juice, about 1 hour. Adjust an oven rack to the lowest position, place a rimmed baking sheet on the rack and heat the oven to 425 degrees.
  • Drain the peaches thoroughly through a colander, reserving 1/4 cup of the juice. In a large bowl, toss the drained fruit, the reserved juice, cornstarch, lemon juice, cinnamon, nutmeg, and salt together until well combined.
  • Spread the peaches into the dough-lined pie plate and weave the chilled strips of dough over the top into a lattice. Let the strips soften for 5 to 10 minutes, then trim, fold, and crimp the edges. Lightly brush the lattice with the egg white and sprinkle with the remaining 1 tablespoon of sugar.
  • Place the pie on the heated baking sheet and bake until the top crust is golden, about 25 minutes. Reduce the oven temperature to 375 degrees, rotate the baking sheet, and continue to bake until the juices are bubbling and the crust is deep golden brown, 25 to 35 minutes longer. Let the pie cool on a wire rack until the filling has set, about 2 hours; serve slightly warm or at room temperature.

Double Crust Pie Dough

*Makes two pie crusts

Ingredients:

2 1/2 cups flour
- 1 tablespoon sugar
- 1 teaspoon salt
- 2 sticks unsalted butter, very cold
- 1/2-1 cup very cold water

Directions:

✿ Fill a one cup liquid measuring cup with water, and drop in a few ice cubes; set it aside. This will allow the water to get really cold. In a large bowl whisk together 2 1/2 cups flour, 1 tablespoon of sugar and a teaspoon of salt. Grate two sticks of very cold unsalted butter into the flour mixture. I put my butter in the freezer for 15 min before grating, to make it easier.

✿ Using a pastry blender or two knives if you don't have one, work in the butter. Do this until the butter resembles the size of peas. It's OK if all the butter isn't the same size.

✿ Next, drizzle 1/2 cup of the ice-cold water over the butter and flour mixture, discarding the ice cubes if there are any left. Using a rubber or silicon spatula, gather the dough together. Add more water 1 tablespoon at a time until the dough comes together. You'll probably need 1/4-1/2 cup of additional water. Once the dough comes together in large clumps with the spatula, take it out and use your hands. Gather the clumps together into one mound, kneading them gently together.

✿ Divide the dough in half, and place each half on a large piece of plastic wrap. Let the dough chill in the fridge for one hour, but preferably at least two, before rolling it out. If you're in a time crunch, I have found that putting the dough in the freezer for 10-15 minutes works just as well.

✿ The dough will keep in the fridge for about a week, and in the freezer longer. If not using it that day, wrap it in additional layers of plastic wrap to protect it from fridge/freezer smells. To defrost your dough, move it to the fridge for one day before using it.


After a long day of baking take a minute to enjoy every bite of a piece of this pie! You deserve it :)

- Gaby


Saturday, August 10, 2013

No Cheese Mac & Cheese

Hello!

I cannot believe that it's already July August! I am so excited about going back to Bishop's I can hardly hold a smile back just thinking about it. It makes me laugh how all my BU friends have been crowding my Facebook and Twitter feeds with countdowns. It goes to show how all our school's students love it so much. I went to Canadian Tire today and bought a whole bunch of kitchen stuff. I had been getting a few things here and there but I went all out today at CT.

I am starting to take this whole blogging thing seriously and I'm spiffing up my editing skills with the two pictures I added to the right side bar of my blog. When you have the time, blogging is really fun and it keeps surprising me how many people are actually reading this!

The recipe for this post is Cauliflower Alfredo. It's great because instead of using cheese it uses cauliflower which is packed with nutrients and less calories. Don't worry though, it is still creamy and you would THINK there was a load of cheese in it, that's how delicious it is!

Cauliflower Alfredo

From Chocolate-Covered Katie

- 1 ½ cups raw cauliflower
¼ tsp garlic powder, or 2 tsp mince
½ tsp salt 
- 2 tbsp butter (or sub 2 tbsp olive oil and a little extra salt if needed) 
- 1 cup milk 

Optional: I add dried rosemary and pepper. 
You don't even know how much I love dried rosemary. Tip: Rub it between your hands before you sprinkle it on to bring out the flavour.

✿ Put all ingredients into a medium pot and bring to a complete boil, then cover and simmer 15 minutes or until the cauliflower is fall-apart tender. 

✿ Pulverize with either an immersion or regular blender. 


✿ Serve over cooked linguine, elbow pasta, or spaghetti squash, rice, steamed veggies, or whatever! 
✿ Makes about 2 cups, and it gets much thicker as it sits.
And guess what... It's only 5 calories for a Tbsp :) You'll need more than that, but it's a good figure to know!!
Lots of love,
Gaby

Thursday, August 8, 2013

Quick Bread That's Actually Quick

Hello!

If any of you readers follow me on Twitter  then you know that one of my summer goals, along with learning to play the ukulele, is learning how to make bread. I've managed to learn how to play the ukulele but... It's early August and there hasn't been any bread popping out of the oven. I don't mean banana bread or rolls, I mean a loaf of sandwich bread. So even though I made awesome bread last night, it wasn't sandwich bread, but one day it will happen, folks! Here is the recipe that Maggie shared with me (via Pinterest) from Cookie Monster Cooking for Buttery Honey Beer Bread

Buttery Honey Beer Bread

Ingredients:

- 2 cups all-purpose flour
- 1 cup whole wheat flour
- 1 Tbs white sugar
- 1 Tbs baking powder
- 1 tsp salt
- 3 Tbs honey
- 1 bottle (12 oz) your favourite beer
- 4 Tbs unsalted butter, melted and cooled slightly

Instructions:

✿ Preheat the oven to 350 degrees. Grease a 9 by 5 inch loaf pan with nonstick cooking spray or butter. Set aside.

✿ In a large bowl, whisk together both kinds of flour, the sugar, baking powder and salt. Add in the honey and beer and mix until just combined. Spread the batter evenly in the prepared pan. Evenly pour the melted butter over the top of the batter.

✿ Transfer the pan to the oven and place a baking sheet on the lower rack to catch any butter that may drip from the pan. Bake for 50 to 60 minutes, until a cake tester inserted in the middle comes out clean and the top is golden brown.


Enjoy!

Monday, July 29, 2013

Grandma Would Be Proud

Hi guys and gals,

Here is the recipe for the chocolate cupcakes with vanilla icing, that I mentioned in my last post. Oh, by the way, I bought some kitchen supplies yesterday. Some containers and a plastic cutting board! Such excitement. In all seriousness though IKEA is the best place to go clear your head. That and Chapters = best places to roam around with not a care in the world. I also got a Quinoa cookbook and some material for the bathroom door at my house because has a glass door. If you're wondering why someone would put a glass door on a bathroom off the kitchen, you're asking the wrong girl.


I had a -25% coupon at Chapters and some gift cards burning a hole in my pocket so I picked up and spent a few solid hours at Chapters and IKEA. I take FOREVER to make decisions so when I got home, our dinner guests had already arrived... my bad. So much for making that homemade bread I was thinking of accompanying our meal!

Small backstory about the base of these cupcakes. It's my Grandma Farlow's Wacky Cake recipe which is like the saviour of all saviours because you'll always have all the ingredients for this cake or these cupcakes in the pantry. If you're making a cake, you can mix all the ingredients right in the pan, so easy right? You can make it in an 8x8 pan or double the recipe and make a 9x13 pan (the latter was a staple at every one of my childhood birthdays), or make 12 cupcakes. 

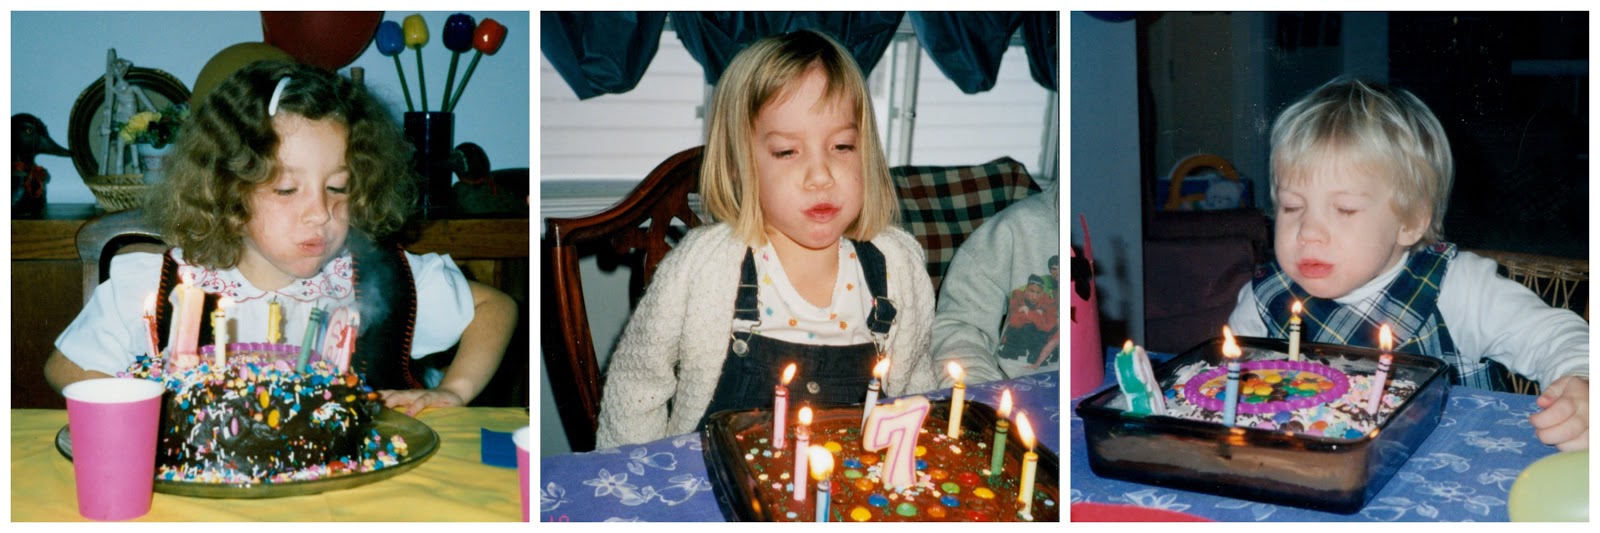
Pure joy on my face. Grandma used to go soooo fast, it's a wonder I could hold on. No joke.

Wacky Cake

Ingredients:

- 1½ cups of flour
- 1 tsp baking powder
- 3 Tbsp cocoa 
 - Dash of salt
- 1 cup white sugar
- 1 tsp baking soda
- 1 tsp vanilla 
- 1 tsp white vinegar
- 5 Tbsp melted butter
- 1 cup tepid water

Directions:

Sift the six first ingredients into a bowl, if you're making cupcakes, or into the pan if you're making a cake.

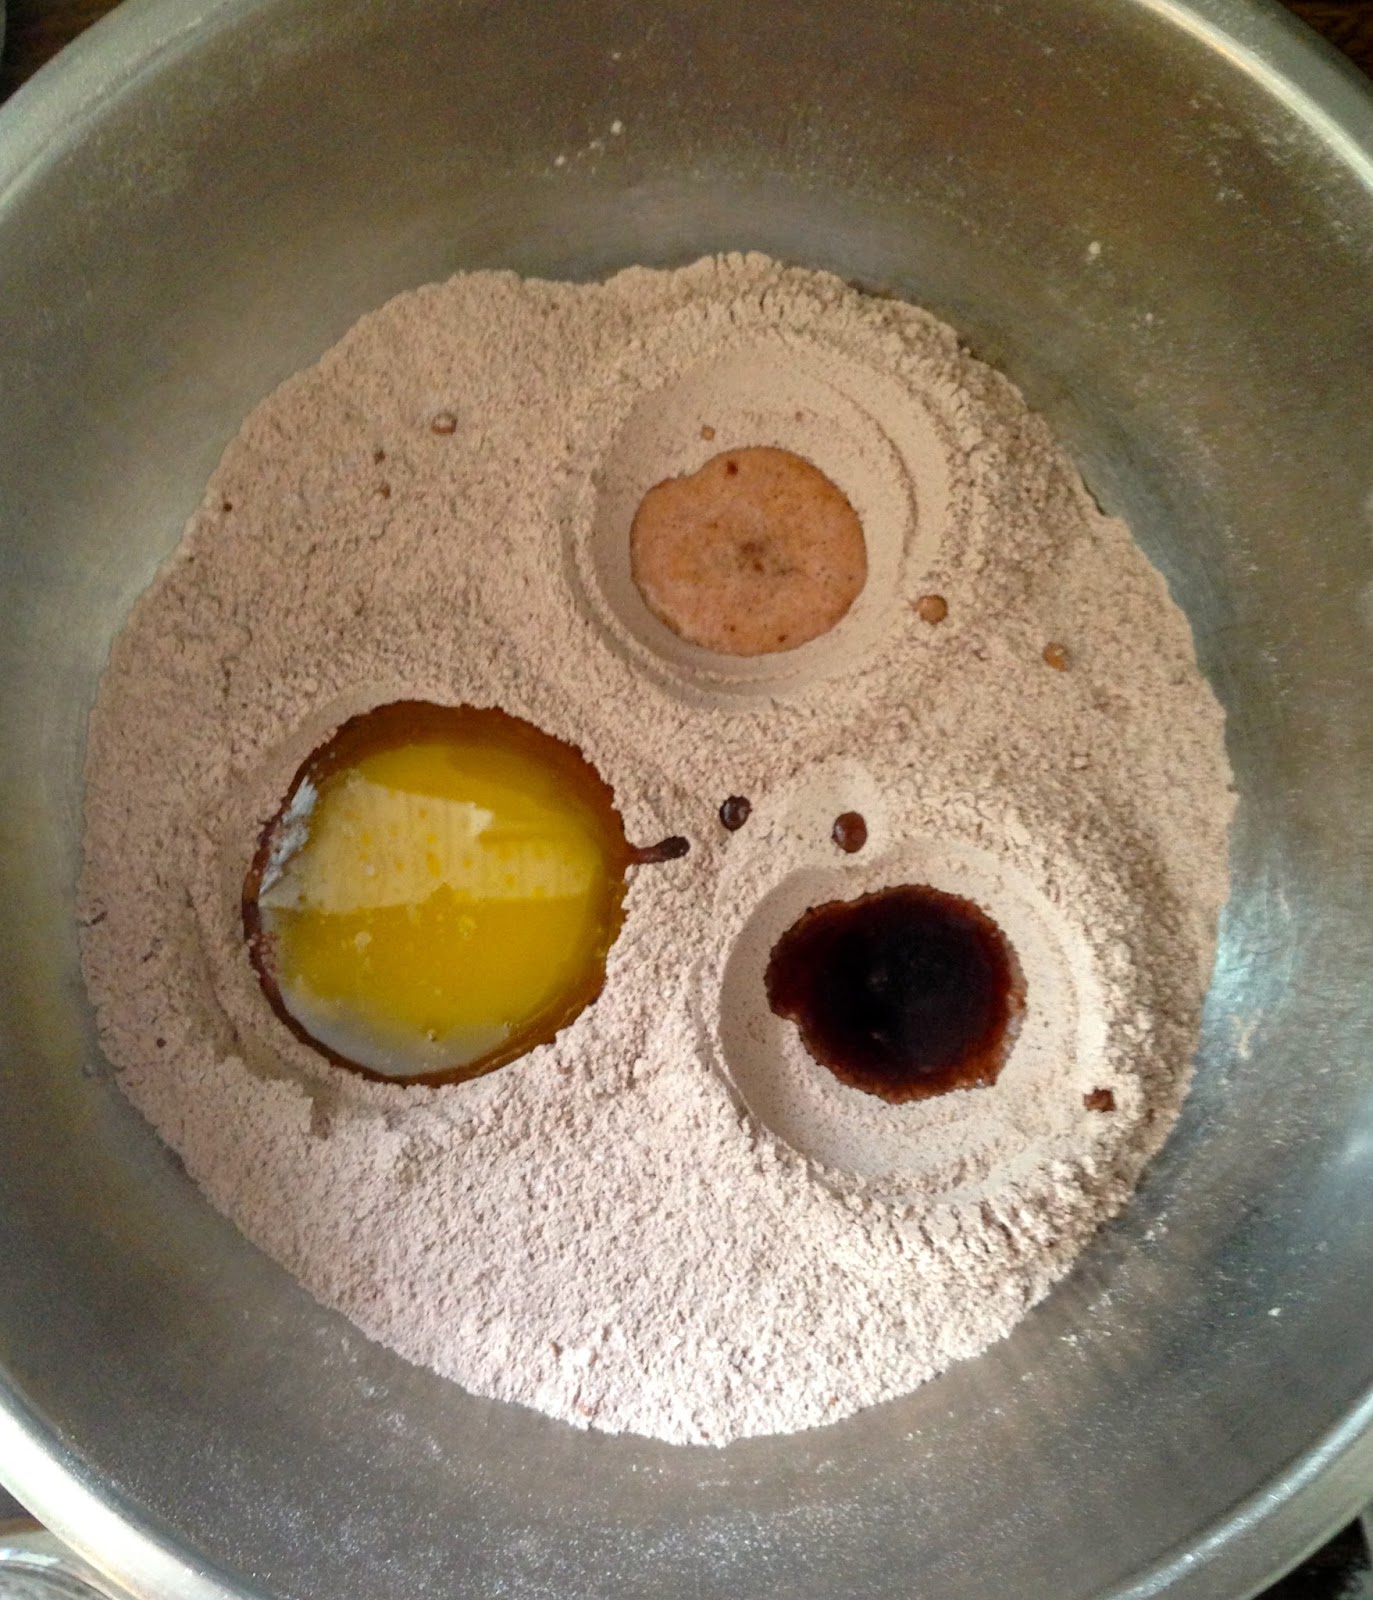
Mix well and then make three holes in the cake (with your spoon).

In one hole add vanilla, in another hole add vinegar, and the butter in the third hole.

✿ Add water to all and stir well.

✿ Bake a 325 degrees for 30 minutes


Classic Vanilla Buttercream Frosting


Ingredients:

1 cup unsalted butter, softened (but not melted!) 
3-4 cups confectioners (powdered) sugar, SIFTED
¼ tsp table salt
1 Tbs vanilla extract
- 2 Tbsp milk 

Instructions:

✿ Beat butter for a few minutes with an electric mixer on medium speed. 

✿ Add 3 cups of powdered sugar and turn your mixer on the lowest speed (so the sugar doesn’t blow everywhere) until the sugar has been incorporated with the butter. 

✿ Increase mixer speed to medium and add vanilla extract, salt, and 2 tablespoons of milk and beat for 3 minutes. 

✿ If your frosting needs a more stiff consistency, add remaining sugar. 

✿ If your frosting needs to be thinned out, add more milk 1 tablespoons at a time.

Enjoy!

Sunday, July 21, 2013

Accidents Happen for a Reason


Hi readers,

In the past week I've heard from a few people that they're missing my blog. It pulled at my heart strings and made me realize that people are actually reading this thing. During the first incidence I literally ran into my friend Shaya, with whom I went to high school (saying that makes me sound 38 years old). I was out for an evening jog and I was looking in Victoire for her lovely window displays, and then I spotted her at the cash and I became that crazy girl who knocks on the store window when it's clearly closed. There was the typical hugging and jumping around that happens when you see a friend you haven't seen in a while, and then we talked and talked. Somewhere along the way, my blog came up and she remarked that I hadn't posted in a while. I just love spontaneous moments like that, because we're all so busy and sometimes we need a little serendipity in our lives.

That, along with other comments from other friends and family, have pushed me to write more. I have been making fab recipes but I just haven't written about any of them. I have the pictures but no words to accompany them.

With that being said, today is a great day because I am going to write a post about cupcakes!!! Cupcakes are staple because there's no need to slice a cake if you're bringing it somewhere and they are easier to frost than a whole cake. They're also great to make because you can split the batch up and give them to different people and everybody thinks you made them a whole batch of cupcakes and they feel special. It feels nice to make people feel special :) (cheesy moment of the day). I made some vanilla cupcakes with chocolate icing and some chocolate cupcakes with vanilla icing, but for now I'm just posting about the former.


Vanilla Cupcakes with Chocolate Malt Icing

Btw, I'm so proud of this picture... It's the background on my phone #fatchild

Vanilla Cupcakes

Ingredients:
I made these about a month ago and forgot where I found the recipe, so it took some serious web surfing to retrieve it. They're totally worth it and from Cookies and Cups.

  • - 1 3/4 cup cake flour (YES, go to the store and get cake flour)
  • - 1 1/4 cup all purpose flour
  • - 1 3/4 cup sugar
  • - 2 1/2 tsp baking powder
  • - 1 tsp kosher salt
  • - 1 cup butter, room temperature, cut into 1/2 inch cubes
  • - 4 eggs
  • - 1 cup milk
  • - 2 tsp vanilla

Directions:

✿ Preheat oven to 350° and line cupcake pan with cupcake liners.

✿ In a large bowl add the first 5 ingredients and stir together using an electric mixer for about a minute. Enough to get them nice and combined.

✿ With mixer on low, drop in butter, a few cubes at a time continuing until all butter is in and mixer resembles coarse sand.

✿ Add eggs one at a time on low speed.

✿ With mixer still on low slowly pour in milk and vanilla. Turn mixer to medium and beat for 2 minutes until batter is smooth, scraping sides of bowl as needed.

✿ Fill liners 2/3 full (about 1/4 cup batter) and bake for 15-20 minutes until centers are set and toothpick comes out clean.

✿ Allow to cool completely before frosting.

Chocolate Malt Icing

This is funny how this chocolate icing became chocolate malt icing. Well I guess it's not that funny but I didn't have enough cocoa powder so I used Ovaltine instead. Which you usually mix with milk to make a "healthier" alternative to hot chocolate. I was a little skeptical but Maggie is always pushing me to try new things in the kitchen, so I took a leap, crossed my fingers, and added the malt mixture. The result: THE BEST ICING. Plus, it's a lighter colour than with only cocoa, which is kind of nice/unique.

This recipe was adapted from Savory Sweet Life. A few highlights of this recipe are that it's the greatest icing for piping cupcakes and it uses milk. Oh, and it also takes about five minutes to make and produces enough for two dozen cupcakes (if you don't put too much on each).

Ingredients:

  • 1 cup unsalted butter, softened (but not melted!)
  • - 3 cups confectioners (powdered) sugar
  • - ¼ cup cocoa powder
  • ¼ cup Ovaltine (or just use the full ½ cup cocoa, and scrap the Ovaltine)
  • ½ teaspoon salt
  • 2 teaspoons vanilla
  • - 3 tablespoons milk
Directions:
✿ Cream butter for a few minutes with an electric mixer on medium speed.

✿ Sift 3 cups powdered sugar, the cocoa, and Ovaltine into the mixing bowl.

✿ Turn your mixer on the lowest speed (so the dry ingredients do not blow everywhere) until the sugar and cocoa are absorbed by the butter.

✿ Increase mixer speed to medium and add vanilla extract, salt, and milk and beat for 3 minutes.

✿ If your frosting needs a more stiff consistency, add a little more sugar. If your frosting needs to be thinned out, add additional milk 1 tablespoon at a time.

**NOTE: Make sure your cupcakes are cooled before you frost them or else the icing will melt and it will be awful. 

I used a frosting bag and tip to pipe them because it looks so professional but hey, if you want to just spread the icing on, there's no problem there. These littles cakes are delicious and a crowd pleaser so do make them. With a few sprinkles and a steady hand people will be calling you Martha Stewart before you turn around to lick the spatula.

Have a wonderful evening and stay tuned for the chocolate cupcakes with vanilla icing. 

xox, Gaby


Friday, June 21, 2013

And then there were two!

Hello lovelies,

I have some good new!!! Yesterday I asked one of my best friends, Maggie, if she would like to be the co-author of my blog. She said YES! So in a little while, Maggie will be writing posts too. I truly believe Maggie will make the blog even better because she is my cooking mentor. Plus she is in with all the cooking trends and likes to treat herself with cooking supplies. But don't worry I won't let her vegan obsession overtake Breakfast at Midnight. We have been cooking together for ages and the times we spend together in the kitchen are spent laughing, dancing, singing, bickering, and sometimes we even get a little cooking done ;) So here is a little collection of photos to introduce you to the my partner in crime. She can do wonders with egg whites and she adds coconut oil to everything:


So folks, let's welcome Magsters to the blog with a classic Patenaude family recipe... Sandy's Butter Tarts.

Sandy's Butter Tarts

I happened to have a 4" cutter but you can use a glass/mug/small bowl too. 

It's okay if you're filling is chunky. 


WARNING: These butter tarts are runny. So if you're looking for firm jelly tarts, bake longer or find another recipe.

Ingredients:

Shells
- 2 cups flour
- ¾ tsp salt
- 1 cup Crisco shortening
- 6 tbsp water

Filling
- 1 cup lightly packed brown sugar
- 1 cup corn syrup
- ½ cup Golden Flavour Crisco
- 2 egg
- 2 tsp vanilla 
- ½ tsp salt
- ¾ cup raisins (optional)

Directions:

Shells
✿ Use two knives or a pastry cutter to combine the flour, salt, and Crisco. 


✿ Drizzle the ice water into the mixture and mix with a fork. Don't get too fierce with your mixing because we don't want to abuse the pastry. Less mixing means more flaky.

✿ Once combined, sprinkle some flour onto the counter and roll it out thinly. Cut rounds with 4'' (10 cm) cutter. 

✿ Grease the muffin cups with the paper lining from the Crisco box. Fit shells into muffin tin.

✿ The nice thing about this recipe, is that it doesn't need to be perfect. It's a real homestyle recipe and I like how they look like something your grandma would give you at a backyard barbecue.

Filling
✿ Combine all filling ingredients except raisins; mix well. As mentioned above, it's alright to have a chunky filling. It all smoothes out while baking.

✿ Put raisins (if you like them) into pastry shells, dividing evenly.

✿ Fill shells almost to the top with the the syrup mixture. NOTE: The filling recipe always makes more than necessary so don't let that trick you into putting too much into the shells.

✿ Bake at 425 degrees for 15 minutes or until the pastry is golden and flaky, and the filling has set on the top. Cooking them longer will make them firmer, but don't burn them!

✿ Cool on wire rack, then use a knife to outline the rim of the muffin tin to get the butter tarts out.

These are sticky but oh so delicious, so don't forget the napkins!

Enjoy :)

xox

Gaby