Monday, September 9, 2013

Wild Blueberries? Muffins!

Hello hello!

I have a little break in my day today so I get to go home! Later on in the year I will probably use this time to be productive but right now I've done everything I can do, so I can goof around on the internet and write a blog post. Here is the muffin recipe I mentioned a little while ago. Oh btw WE HAVE INTERNET. So I can finally write blog posts from home, which is ten thousand times more convenient.

Banana Blueberry Oatmeal Muffins

1 ½ C whole wheat flour
1 C oats 
1 tsp baking soda
2 tsp baking powder
½ tsp salt
¼ C sugar
¼ heaping C melted coconut oil
1 tsp vanilla 
1 egg
2 large bananas 
⅓ C apple sauce
¼ hemp hearts (optional)
1 C blueberries 

✿ Combine flour, oats, baking powder, baking soda, and salt in a bowl. Set aside.
✿ Mash bananas and add in sugar, melted coconut oil, vanilla, egg, apple sauce and mix well.
✿ Combine wet and dry ingredients and then add the hemp hearts (optional) and blueberries.
✿ Fill 18 muffin cups with liners or spray with cooking oil/spray.
✿ Bake for 17 minutes at 400 degrees.


These are so good and it makes so many! Plus they are pretty healthy for you :) Enjoy!

Gaby


Friday, September 6, 2013

Dessert and Drinks

Hi readers,

I'm sitting in Tim Hortons and using their WiFi but I didn't buy anything. I'm such a rebel. I hope everybody had a smooth transition back to school, and that my friends in their first year haven't died during frosh. We still don't have internet but our house is really shaping up! Here are a few pics of my room:


DIY project
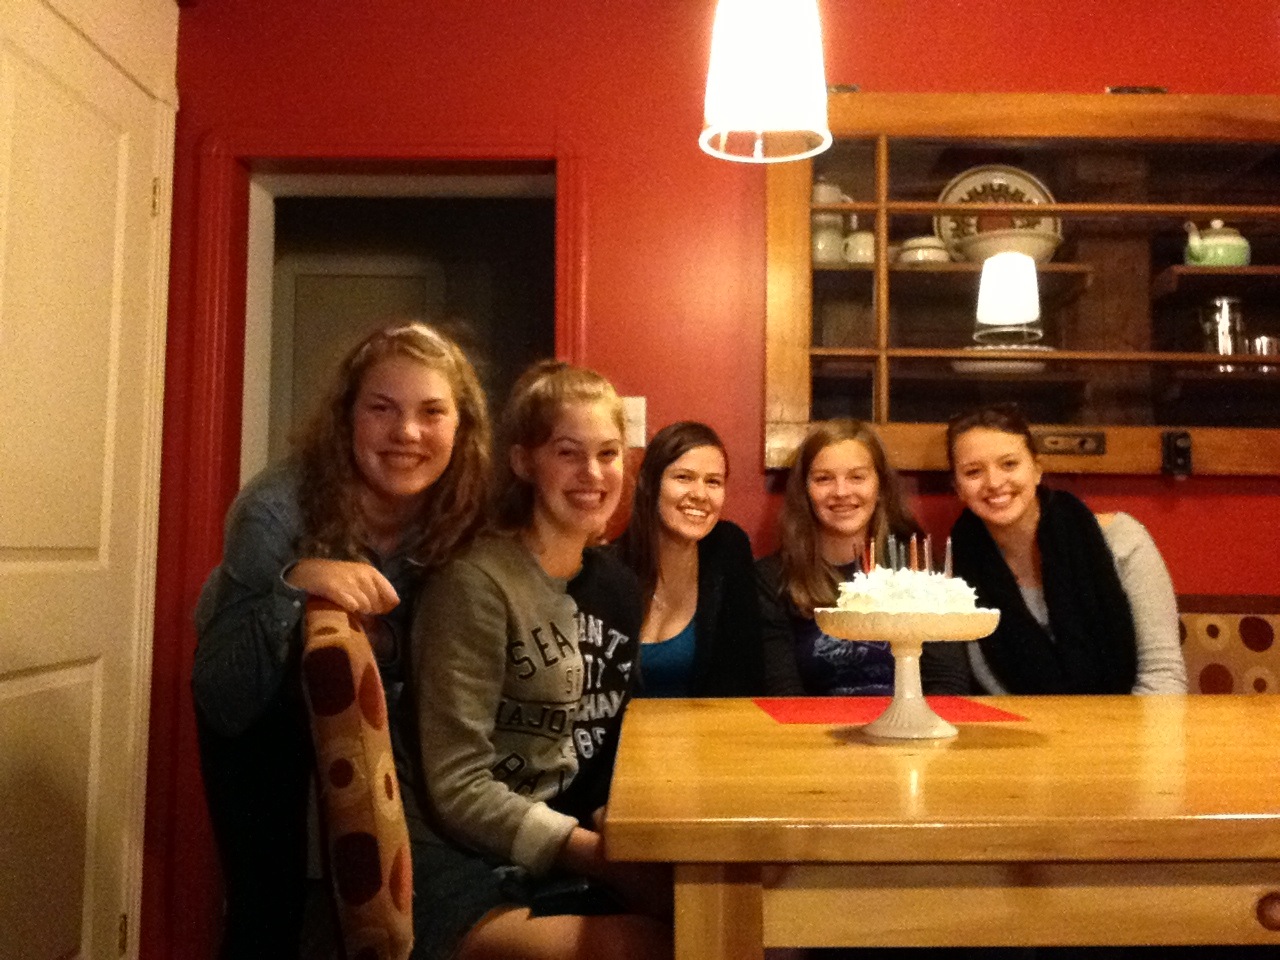
My roomates Sara and Ariane had birthdays in August so we celebrated last night with a vegan cake I made. Since Sara is vegan I decided to alter a recipe I had already made. I used my Grandma's Wacky Cake recipe but instead of using butter, I used margarine. For the icing I used the following recipe

Vegan Buttercream

Ingredients:

- ¼ cup vegetable shortening
- ¼ cup margarine
- 2 cups icing sugar
- 3 Tbsp almond milk

 Directions:

✿ Whip margarine and shortening together with an electric mixer.

✿ Slowly add sugar and milk in small amounts.

✿ Add a few Tbsp of cocoa powder for chocolate icing

Chocolate Center!!

Nice face...

#selftimer


By the way this is the cake stand I bought at Chapters that I mentioned a few posts ago. After the birthday celebrations last night I went over to some friends' house for our usual Shirley Temple Thursday. I'm happy that the bottle of grenadine survived the move and that Elizabeth has fancy glasses to drink them in. I swear they taste better in those instead of Dewies cups. There may or may not have been some vodka added to them as well...

Thanks for reading!

xox Gaby

Tuesday, September 3, 2013

Lobsters and Labour Day

Hi guys!

I am finally settled into my house in Lennoxville and I'm loving it! I will post pictures as soon as everything is put away and my room is decorated. I started some DIY decorations for my room yesterday but then got distracted by visitors and now my room looks like the clearance section at Michael's. Since my housemates (Ellen, Sara, and Ariane) and I don't have internet yet, I am camped out in the library using their internet.

I have started cooking and some of the recipes I've made so far include the Green Monster smoothie, and the cauliflower pasta. I went grocery shopping before my mom and Steffi left on Sunday and my cart was overflowing. At least I have stuff to put in my cupboards now! I'm super pumped though cause Sara's grandparents got us a NutriBullet (made by Magic Bullet) and I've already tested it out! We also have enough tupperware to have a startup business so I will be making tons of meals and freezing them. But for now, I'm going to a free supper in a church basement with friends #studentliving.


I left my muffin recipe in my kitchen so I can't share it with you now, but one day I will for sure. Instead, I can tell you guys about my amazing trip to Maine. As you might know from reading my Montreal post, I love seafood, so I'm in heaven in Maine. One of my favourite things to do there is go to Red's Eats lobster shack. They have the most amazing lobster rolls with more than a whole lobster's meat in EACH ONE! They have been written about in so many magazines such as Bon Appétit. I once read a fictional book where the author added that the characters ate there! I felt so in the know.

Here are some pictures from our trip!

At the Pemequid Lighthouse


My absolute favourite candies! Only at the Granite General Store in Round Pound, ME


I die every time #fatchild

Hey there handsome!

Sea kayaking 


The view from our cottage 

Too bad Britt wasn't there :(

When we attempted to ride in the row boat. #Thenotebook
I had a fantastic summer and an amazing trip but I'm glad to be back. There's something unbelievably welcoming about Bishop's and it's nice to walk down the street and run into four people you know within the first few minutes. The best thing happened to me today. I was in the bookstore with Sara and Ellen and I saw a froshie checking out a psych book. I knew that that book was for a class I took last year so I used my upper year wisdom and told her that she doesn't need the book and the prof even recommends not buying it. She was really happy that I saved her $180 and I was even happier because she was like "Hey, you have a cooking blog right?" and I was all like "Ya! That's so cool that you recognized me" but on the inside I was like "HOLY SMOKES, I'M FAMOUS". So if you're reading Emma, thanks for making my day.  

See you on the flip side folks.

- Gaby


Monday, August 19, 2013

I'd Say That's Magic!

Hello lovely people,

I'm going to make this short and sweet. If you don't already know, I'm crazy about ice cream. I love it! Here is a great topping for ice cream and it only takes two ingredients!!! I know right? Awesome :)

Chocolate Shell

Ingredients:

- 1 Tbsp coconut oil 
- ¼ cup milk chocolate chips

Directions:

✿ Melt coconut oil and milk chocolate chips in the microwave. 

✿ Serve over ice cream and watch it harden in seconds!


Don't forget to have a little fun in the last couple of weeks of summer. Maggie and I went on our annual golf cart adventure this past weekend and I am surprised I still have all my limbs. Hahaha only the two of us would be going full speed down a gravel road in bathing suits "driving" a golf cart.

- Gaby


Tuesday, August 13, 2013

Peach Pie Please!

Hi foodies,

In today's post I'm going to blog about the magic of cottages. There's something about being at a cottage that puts you in a special mood. My aunt Nini has a cottage and even though it's twenty minutes outside the city, in Chelsea, Quebec, as soon as I get there I'm so relaxed and ready to have a good time. Since it's so close we can go up for family dinners and a swim and then drive home the same night.

Last Sunday we went up and I made Nini's favourite, peach pie. Yum yum was it ever good! I discovered this recipe last summer when Maggie and I were running a culinary camp at Dovercourt Recreation Center. The campers' parents were so impressed and with reason! The lattice top takes a little extra work but it's totally worth it. Brush some egg whites and sprinkle a little sugar on top of it before baking and you'll have people jumping through hoops and kissing your feet for more.

Just before you start making this pie, realize that it takes a while to make from start to finish. I'm talking hours and hours. Don't be scared away by this! Most of this time is the dough chilling, or the peaches soaking. Just be patient, the steps aren't that difficult, they're straight forward just lengthy.


Lattice Top Peach Pie

From America's Test Kitchen 

-1 recipe double-crust pie dough (you could use the roll out dough at the grocery if you wanted to)
- flour for work surface
- 2 1/2 pounds ripe peaches (7-8 medium), peeled (NAKED), pitted, and sliced 1/2 inch thick
- 1 cup, plus 1 Tbsp sugar
- 1 Tbsp cornstarch
- 1 Tbsp juice from one lemon
- pinch ground cinnamon
- pinch ground nutmeg
- pinch table salt
- 1 large egg white, lightly beaten

Directions:
  • Roll one disk of dough into a 12-inch circle on a lightly floured work surface, then fit it into a 9-inch pie plate, letting the excess dough hang over the edge; cover with plastic wrap and refrigerate 30 minutes to an hour.
  • Roll the other disk of dough into a 13 1/2 by 10 1/2-inch rectangle, then transfer to a parchment-lined baking sheet. Trim the dough to a 13 by 10-inch rectangle with straight edges and slice it lengthwise into eight 13-inch long strips. Separate the strips slightly, cover with plastic wrap, and freeze until very firm, about 30 minutes. *Note: You don't have to do a lattice crust on top, you could just put the second disk of dough on top and cut slits in the top to let steam escape.
  • To make naked peaches (aka peel them) make an x in the top of them with a pairing knife and then soak them in boiling water for 30 seconds. Place them in cold water while you soak the others in the boiling water.


  • Toss the peaches and add 1 cup of the sugar together in a large bowl and let sit, tossing occasionally, until the peaches release their juice, about 1 hour. Adjust an oven rack to the lowest position, place a rimmed baking sheet on the rack and heat the oven to 425 degrees.
  • Drain the peaches thoroughly through a colander, reserving 1/4 cup of the juice. In a large bowl, toss the drained fruit, the reserved juice, cornstarch, lemon juice, cinnamon, nutmeg, and salt together until well combined.
  • Spread the peaches into the dough-lined pie plate and weave the chilled strips of dough over the top into a lattice. Let the strips soften for 5 to 10 minutes, then trim, fold, and crimp the edges. Lightly brush the lattice with the egg white and sprinkle with the remaining 1 tablespoon of sugar.
  • Place the pie on the heated baking sheet and bake until the top crust is golden, about 25 minutes. Reduce the oven temperature to 375 degrees, rotate the baking sheet, and continue to bake until the juices are bubbling and the crust is deep golden brown, 25 to 35 minutes longer. Let the pie cool on a wire rack until the filling has set, about 2 hours; serve slightly warm or at room temperature.

Double Crust Pie Dough

*Makes two pie crusts

Ingredients:

2 1/2 cups flour
- 1 tablespoon sugar
- 1 teaspoon salt
- 2 sticks unsalted butter, very cold
- 1/2-1 cup very cold water

Directions:

✿ Fill a one cup liquid measuring cup with water, and drop in a few ice cubes; set it aside. This will allow the water to get really cold. In a large bowl whisk together 2 1/2 cups flour, 1 tablespoon of sugar and a teaspoon of salt. Grate two sticks of very cold unsalted butter into the flour mixture. I put my butter in the freezer for 15 min before grating, to make it easier.

✿ Using a pastry blender or two knives if you don't have one, work in the butter. Do this until the butter resembles the size of peas. It's OK if all the butter isn't the same size.

✿ Next, drizzle 1/2 cup of the ice-cold water over the butter and flour mixture, discarding the ice cubes if there are any left. Using a rubber or silicon spatula, gather the dough together. Add more water 1 tablespoon at a time until the dough comes together. You'll probably need 1/4-1/2 cup of additional water. Once the dough comes together in large clumps with the spatula, take it out and use your hands. Gather the clumps together into one mound, kneading them gently together.

✿ Divide the dough in half, and place each half on a large piece of plastic wrap. Let the dough chill in the fridge for one hour, but preferably at least two, before rolling it out. If you're in a time crunch, I have found that putting the dough in the freezer for 10-15 minutes works just as well.

✿ The dough will keep in the fridge for about a week, and in the freezer longer. If not using it that day, wrap it in additional layers of plastic wrap to protect it from fridge/freezer smells. To defrost your dough, move it to the fridge for one day before using it.


After a long day of baking take a minute to enjoy every bite of a piece of this pie! You deserve it :)

- Gaby


Saturday, August 10, 2013

No Cheese Mac & Cheese

Hello!

I cannot believe that it's already July August! I am so excited about going back to Bishop's I can hardly hold a smile back just thinking about it. It makes me laugh how all my BU friends have been crowding my Facebook and Twitter feeds with countdowns. It goes to show how all our school's students love it so much. I went to Canadian Tire today and bought a whole bunch of kitchen stuff. I had been getting a few things here and there but I went all out today at CT.

I am starting to take this whole blogging thing seriously and I'm spiffing up my editing skills with the two pictures I added to the right side bar of my blog. When you have the time, blogging is really fun and it keeps surprising me how many people are actually reading this!

The recipe for this post is Cauliflower Alfredo. It's great because instead of using cheese it uses cauliflower which is packed with nutrients and less calories. Don't worry though, it is still creamy and you would THINK there was a load of cheese in it, that's how delicious it is!

Cauliflower Alfredo

From Chocolate-Covered Katie

- 1 ½ cups raw cauliflower
¼ tsp garlic powder, or 2 tsp mince
½ tsp salt 
- 2 tbsp butter (or sub 2 tbsp olive oil and a little extra salt if needed) 
- 1 cup milk 

Optional: I add dried rosemary and pepper. 
You don't even know how much I love dried rosemary. Tip: Rub it between your hands before you sprinkle it on to bring out the flavour.

✿ Put all ingredients into a medium pot and bring to a complete boil, then cover and simmer 15 minutes or until the cauliflower is fall-apart tender. 

✿ Pulverize with either an immersion or regular blender. 


✿ Serve over cooked linguine, elbow pasta, or spaghetti squash, rice, steamed veggies, or whatever! 
✿ Makes about 2 cups, and it gets much thicker as it sits.
And guess what... It's only 5 calories for a Tbsp :) You'll need more than that, but it's a good figure to know!!
Lots of love,
Gaby

Thursday, August 8, 2013

Quick Bread That's Actually Quick

Hello!

If any of you readers follow me on Twitter  then you know that one of my summer goals, along with learning to play the ukulele, is learning how to make bread. I've managed to learn how to play the ukulele but... It's early August and there hasn't been any bread popping out of the oven. I don't mean banana bread or rolls, I mean a loaf of sandwich bread. So even though I made awesome bread last night, it wasn't sandwich bread, but one day it will happen, folks! Here is the recipe that Maggie shared with me (via Pinterest) from Cookie Monster Cooking for Buttery Honey Beer Bread

Buttery Honey Beer Bread

Ingredients:

- 2 cups all-purpose flour
- 1 cup whole wheat flour
- 1 Tbs white sugar
- 1 Tbs baking powder
- 1 tsp salt
- 3 Tbs honey
- 1 bottle (12 oz) your favourite beer
- 4 Tbs unsalted butter, melted and cooled slightly

Instructions:

✿ Preheat the oven to 350 degrees. Grease a 9 by 5 inch loaf pan with nonstick cooking spray or butter. Set aside.

✿ In a large bowl, whisk together both kinds of flour, the sugar, baking powder and salt. Add in the honey and beer and mix until just combined. Spread the batter evenly in the prepared pan. Evenly pour the melted butter over the top of the batter.

✿ Transfer the pan to the oven and place a baking sheet on the lower rack to catch any butter that may drip from the pan. Bake for 50 to 60 minutes, until a cake tester inserted in the middle comes out clean and the top is golden brown.


Enjoy!